Difference between revisions of "Pen's Room"
| (3 intermediate revisions by the same user not shown) | |||
| Line 2: | Line 2: | ||
|image=EvenCarePenRoom.png | |image=EvenCarePenRoom.png | ||
|imagewidth= | |imagewidth= | ||
| − | |imagecaption= | + | |imagecaption=Standing on the keyboard |
|image2=EvenCarePenIcon.png | |image2=EvenCarePenIcon.png | ||
| + | |image2width=50px | ||
|image2caption= | |image2caption= | ||
|title=Pen's Room | |title=Pen's Room | ||
| Line 11: | Line 12: | ||
{{revisited|9}} | {{revisited|9}} | ||
* Exits: | * Exits: | ||
| − | ** [[Amber's Room]] | + | ** [[Amber's Room]] |
| − | ** [[Even Care Empty Room|Empty Room]] (in [[Petscop 1|1]]) | + | ** [[Even Care Empty Room|Empty Room]] (only in [[Petscop 1|1]]) |
| − | {{linked to|[[Daisy Shack#Basement|Daisy Shack]]}} | + | {{linked to|the [[Daisy Shack#Basement|Daisy Shack]]}} |
| − | {{contains | + | {{contains pieces|12}} |
}} | }} | ||
| − | This room has two exits; one to [[Amber's Room]] on the upper right, and one to the [[Even Care Empty Room|Empty Room]] leading to [[Wavey and Randice's Room]] to the west. It is a very long, horizontal room. It is where the pet [[Pen]] can be found. It contains {{ | + | This room has two exits; one to [[Amber's Room]] on the upper right, and one to the [[Even Care Empty Room|Empty Room]] leading to [[Wavey and Randice's Room]] to the west. It is a very long, horizontal room. It is where the pet [[Pen]] can be found. It contains {{pieces|12}}, in four groups of three. |
== Appearances == | == Appearances == | ||
Latest revision as of 01:57, 18 November 2018
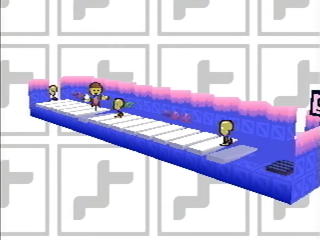
 Standing on the keyboard |
| Pen's Room |
|---|
|
This room has two exits; one to Amber's Room on the upper right, and one to the Empty Room leading to Wavey and Randice's Room to the west. It is a very long, horizontal room. It is where the pet Pen can be found. It contains ![]() 12, in four groups of three.
12, in four groups of three.
Appearances
Petscop 1
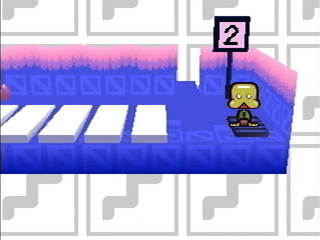
In Petscop 1, there are 15 white piano keys along the bottom end of the room. When the player steps on them, additional copies of the player are temporarily created every 7 keys. Pen's position on the keys is determined by the conveyor and sign. When the player isn't on the piano, Pen will be standing on the rightmost key; when the player stands on a key, Pen will teleport and stay a number of spaces away from the leftmost clone, depending on the conveyor.
Setting the conveyor sign to 7 will make Pen collide with one of the clones, catching them.
The conveyor uses the same numerals as the rest of the UI, and can show the numbers 2 through 7. Going past those will make it wrap around to the other end.
Petscop 9
For more details, see Petscop 9.
In Petscop 9, the left door is closed, rendering the room behind it inaccessible.
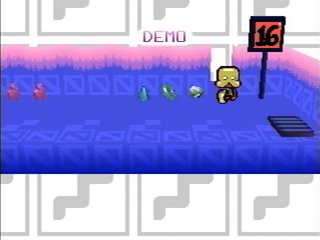
The demo visits this room first, revealing that it is different than in the first visit. Rather than the piano and conveyor puzzle, the piano keys are entirely gone, and the conveyor and sign are different.
The conveyor sign can show numbers from 16 to -1 (negative one). Even numbers will have a reddish background, while odd numbers will have a pinkish background. The conveyor will not go beyond either limit, and walking on it will not change it. It makes the same sounds as the daisy in the daisy shack.
The conveyor sign starts at 16. The demo walks on it until it reaches 3, pauses, and then walks until it reaches 0, at which point the game freezes. When the player visits it later in the video, the conveyor is at 0. They raise it to 16, then lower it back to -1. After stepping off of the conveyor, the game continues to run normally before freezing a few seconds later.
Petscop > Episodes > Information by episode > Introduced by episode > Introduced in Petscop 1
Petscop > Episodes > Information by episode > Visited by episode > Visited in Petscop 1
Petscop > Locations > Gift Plane > Even Care
Petscop > Locations > Locations by feature > Linked locations
Petscop > Locations > Locations by feature > Locations with pieces
Visited in Petscop 9


